Setting up your Email in Microsoft Outlook 2003
This “How To” shows you how to set up an email address in Microsoft Outlook 2003.
For “How To’s” on setting up your Email in Microsoft Outlook Express or Microsoft Outlook 2007, please see our other “How To” Guides.
To Set Up Your E-mail in Microsoft Outlook 2003
1. In Outlook 2003, click on the Tools menu, then select E-mail Accounts.
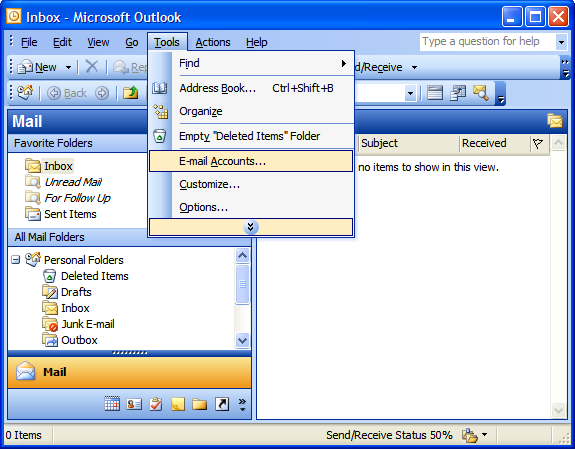
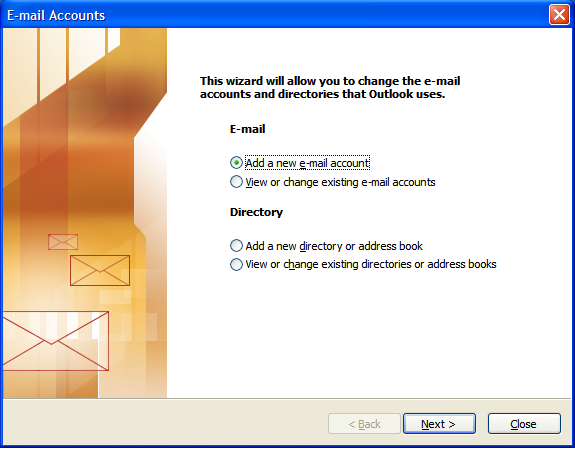
2. In the E-mail Accounts wizard window, select Add a new e-mail account, and then click Next.
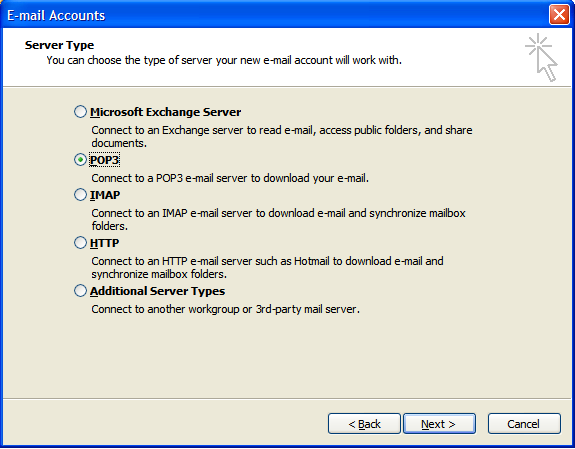
3. For your Server Type, select POP3 and then click Next.
4. In the Internet E-mail Settings (POP3) window, enter your information as follows:
Your Name
Your first and last name.
E-mail Address
Your full Email address.
User Name
Your full Email address, again.
Password
Your Email Account password that was chosen when the email address was setup.
Incoming mail server (POP3)
“mail.your-domain.com.au” (where ‘your-domain.com.au is replaced with your actual Domain Name.
Outgoing mail server (SMTP)
“your-outgoing-mail-server” (where ‘your-outgoing-mail-server is replaced with your specific Internet Provider’s Outgoing Mail Server (eg. “mail.bigpond.com” if Telstra Bigpond is your ISP, “mail.optusnet.com.au” for Optus, “mail.tpg.com.au” for TPG, etc).
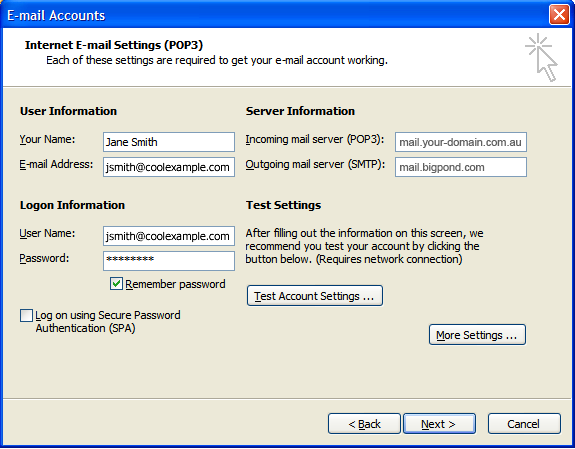
7. Click Test Account Settings to verify everything is configured correctly.
8. Click Next and then click Finish.
Removing message copies from the Mail Server
1. On the Tools menu, click E-mail Accounts.
2. Click View or change existing e-mail accounts, and then click Next.
3. Select your account, and then click Change.
4. Click the More Settings button.
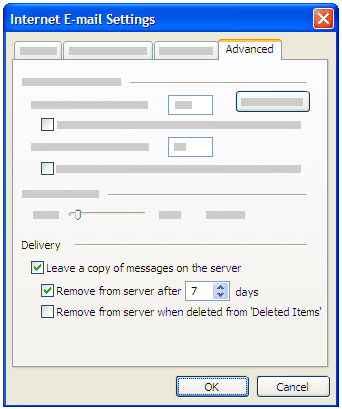
5. Click the Advanced tab, and under Delivery, select the Leave a copy of messages on the server check box.
6. Select the Remove from server after and type in a value of however many days you’s like. The example shows 7 days. This will tell the Mail Server to download all Email messages to your computer but only leave a copy of the messages on the server for a certain number of days. This allows people who want to read their messages at work but also download them for permanent storage on their home computer. We recommend that you choose the smallest number of days that suits your needs. The longer you leave messages on your Mail Server, the greater the risk of filling-up your Mail Server and exceeding your mailbox size quota.
7. Click OK, and then click Finish.
